Learning how to paint a barn quilt block is one of the most satisfying DIY projects you can take on. The finished piece — a bold, geometric square of painted wood — can hang on your barn, garage, shed, fence, or any outdoor wall for decades with minimal maintenance. This complete guide walks you through every step, from selecting your wood to sealing the finished design, with tips to help you avoid the most common mistakes first-timers make.
What You Need Before You Start
Gathering the right materials before you begin saves multiple trips to the hardware store and prevents the frustration of stopping mid-project. Here is the complete list:
- Plywood or cedar board — 3/4 inch exterior-grade plywood, marine plywood, or solid cedar. Size is up to you: common sizes are 2×2 ft, 2×4 ft, and 4×4 ft. Larger squares are more visible from the road but require more careful handling.
- Exterior latex primer — one quart covers most barn quilt sizes. Oil-based primer is more durable but slower to dry.
- Exterior latex paint — one quart per color is usually enough. Flat or satin finish; avoid gloss (it shows brush strokes).
- Clear exterior sealer or varnish — UV-blocking polyurethane or spar urethane protects against fading and moisture.
- Painter’s tape — 1-inch width for most lines; 1/2-inch for tighter detail work. Frog Tape brand bleeds less than standard blue tape.
- Foam rollers — 4-inch small foam rollers give smooth, even coverage without brush marks. Use one per color.
- Flat paintbrushes — 1-inch and 2-inch flat brushes for corners and edges the roller can’t reach.
- Pencil and ruler — for transferring your grid and pattern lines to the wood.
- Sandpaper — 80-grit for smoothing rough edges; 220-grit for final sanding between coats.
- Sawhorse or work table — you need to paint lying flat, not propped against a wall.
- Pattern template or grid paper — download a free printable grid from Pinterest or draw your own on graph paper.
Before buying paint, choose your pattern. The pattern determines how many colors you need and how complex the taping will be. If this is your first barn quilt, start with a simple 4-block or 9-patch design rather than a complex 8-pointed star. See our guide on how to choose a barn quilt pattern if you need help deciding.
How to Paint a Barn Quilt Block: Step by Step
Step 1: Prepare the plywood
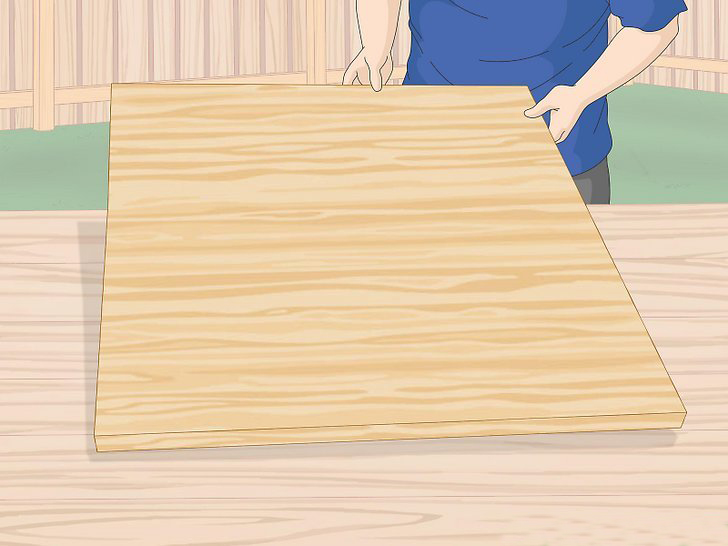
Cut your plywood to the desired size if it is not already pre-cut. Use a circular saw or table saw to ensure straight, square cuts. Once cut, sand all edges with 80-grit sandpaper until smooth — rough edges will catch and peel paint. Wipe the entire surface with a tack cloth or damp rag to remove sawdust. Allow to dry completely before applying primer.
If you are using cedar or reclaimed barn wood, check for knots. Large knots can bleed resin through paint over time; seal them with shellac-based primer before applying your base coat.
Step 2: Apply exterior primer
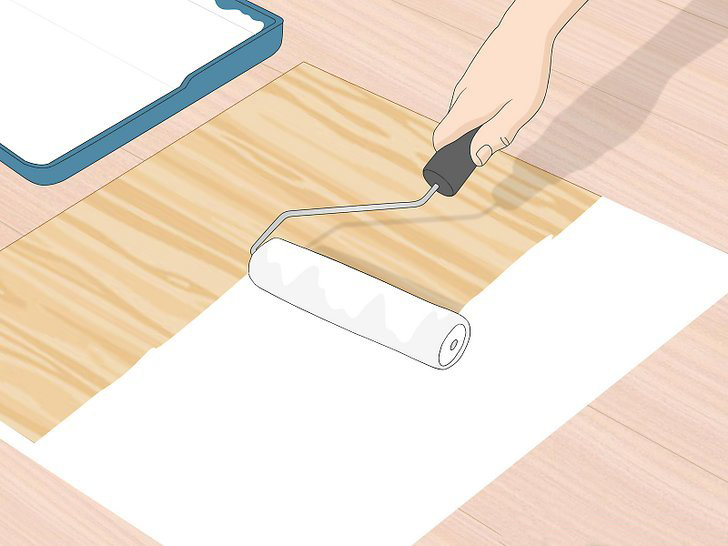
Apply one even coat of exterior latex primer using a 4-inch foam roller. Work in long, overlapping strokes to avoid roller marks. Pay special attention to the edges — these are where moisture enters and paint fails first. Allow the primer to dry completely, at least two hours, before touching the surface.
Once dry, lightly sand the primed surface with 220-grit sandpaper. This knocks down any raised wood grain or dried brush hairs that would otherwise show through your finished paint. Wipe clean with a tack cloth. Apply a second coat of primer if the wood grain is still visible through the first coat.
Step 3: Transfer the pattern to the wood
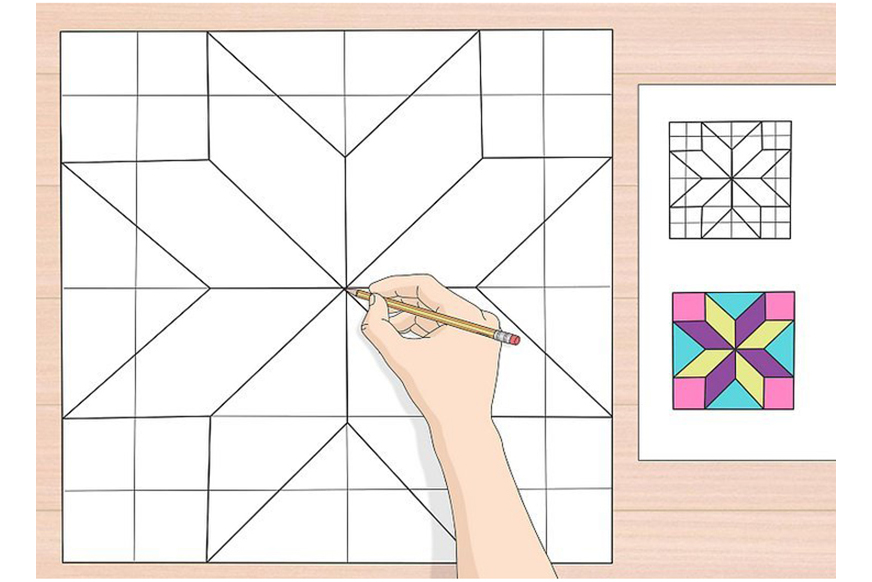
This step requires patience but determines whether your finished quilt looks sharp or slightly off. Start by marking the center point of your board. For a 4×4 ft board, that is 24 inches from each edge. From the center, measure outward to create your grid.
Most barn quilt patterns are based on a grid — either an 8×8 or a 16×16 division of the square. Divide your board width by the number of grid squares to find each unit size. For a 4-foot board on an 8×8 grid, each unit is 6 inches. Mark lightly with a pencil — these lines will be covered by paint, but use light pressure in case you need to erase.
Use a carpenter’s square to verify that your corners are exactly 90 degrees. A barn quilt that is even slightly off-square becomes more obvious the larger it is. Take your time here — this is the most important prep step.
Step 4: Apply the base color and tape off your design
Paint the entire board in your base (background) color first. Apply two coats with a foam roller, allowing full drying time between coats. This creates a clean, even foundation and makes taping easier than taping directly on bare primer.
Once the base color is fully dry (at least four hours, or overnight is better), apply painter’s tape along your pencil grid lines to mask off the sections you want to keep in the base color. Press the tape edges down firmly with your fingernail or a putty knife to prevent paint bleeding under the edge.
Pro tip: For crisp lines on curves or angles, apply the tape, then seal the edge with a thin coat of base-color paint first. This seals any gaps so when you apply your second color, it bleeds into the base coat rather than showing as a ragged line.
Step 5: Paint from lightest color to darkest
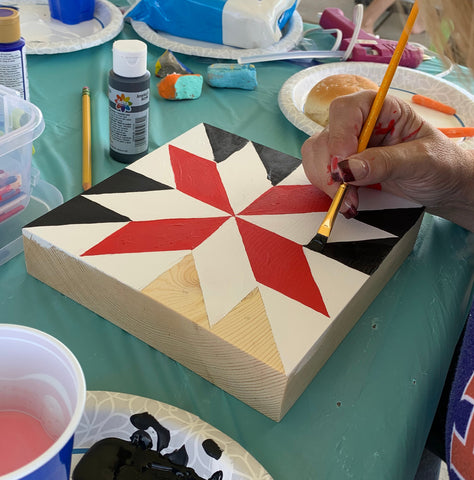
Always work from lightest to darkest color. Light colors are more transparent and can be affected by a dark color beneath them; dark colors painted last cover any stray marks from earlier stages more easily.
Apply two to three thin coats rather than one thick coat. Thick coats of exterior paint dry slowly and are prone to drips, brush marks, and cracking. Thin coats dry faster, bond better, and produce a smoother final surface. Allow each coat to dry fully before applying the next.
Use a separate foam roller for each color to avoid contamination. Small 4-inch rollers are ideal for filling in the sections of a barn quilt; use a flat brush to cut in neatly at the tape lines and in corners the roller cannot reach.
Step 6: Work through all remaining colors
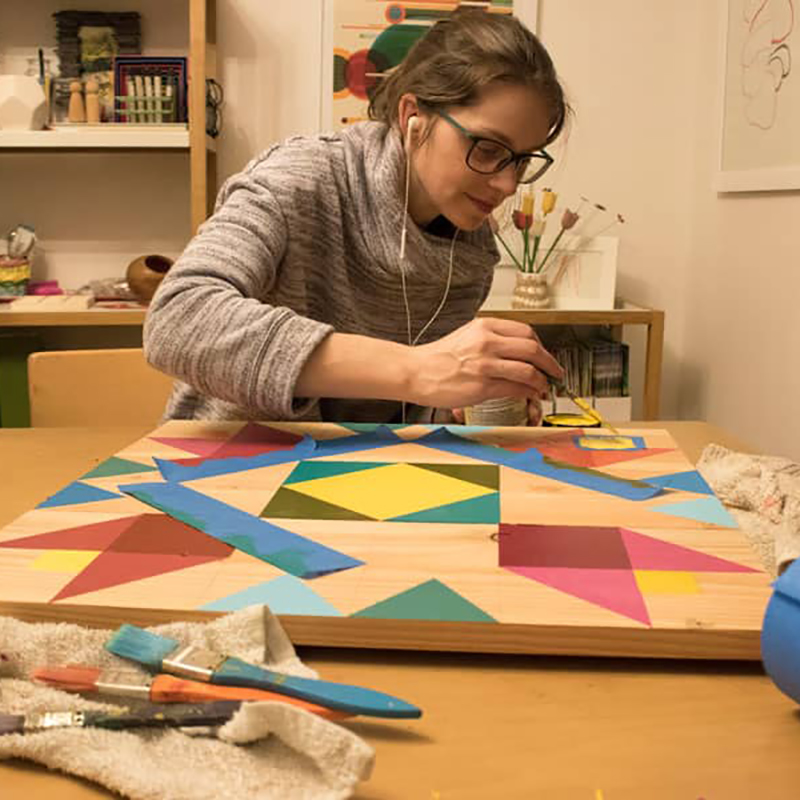
Continue moving from lightest to darkest, taping and painting one color section at a time. Allow each color to dry completely before applying tape for the next section — tape applied over wet or even slightly tacky paint will lift it when removed.
If your design has sections that share a boundary, let the first color dry for at least 24 hours before taping over it. This is one of the main areas where impatience shows up as peeled paint in the finished piece.
Keep a small cup of base-color paint nearby for touch-ups. Small bleeds under tape, especially at corners, are nearly inevitable. A fine-tipped brush dipped in the base color covers most mistakes in seconds.
Step 7: Remove the painter’s tape
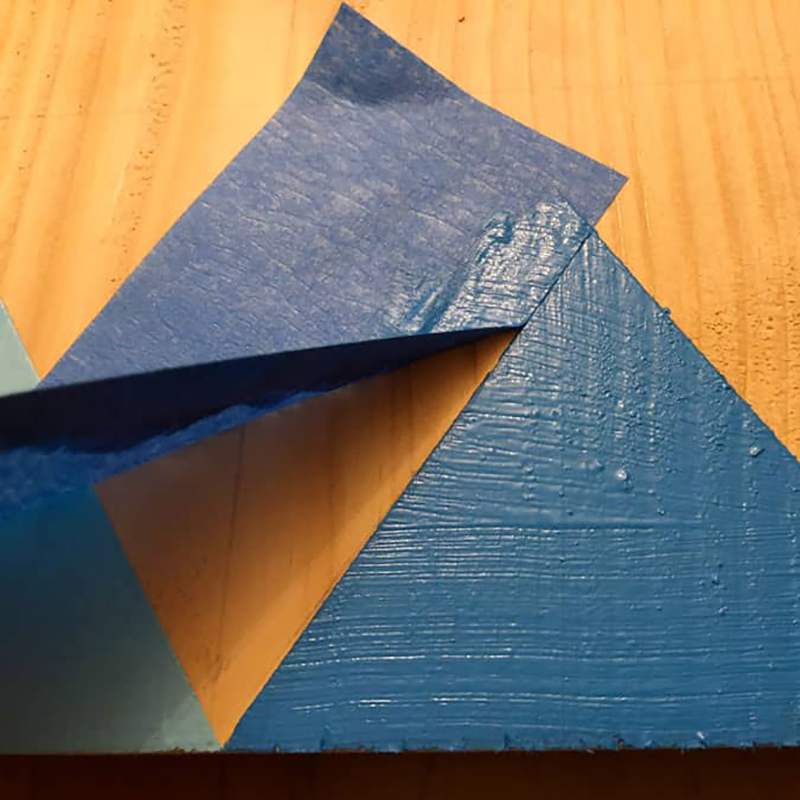
Remove painter’s tape while the final coat is still slightly tacky — not wet, but not bone dry. If you wait until the paint is fully hard, the tape can pull chips of paint with it. If the paint is too wet, you risk smearing. Slightly tacky is the sweet spot.
Pull the tape back at a 45-degree angle, slowly and steadily. Do not yank it straight back. If the tape seems to be pulling paint, use a utility knife to score lightly along the tape edge before removing it.
Step 8: Apply a protective top coat
This step is often skipped by first-timers and regretted later. A clear UV-resistant top coat is what separates a barn quilt that looks fresh for ten years from one that starts fading after two. Apply two coats of exterior spar urethane or polyurethane with a UV inhibitor. Satin finish is the most forgiving for outdoor use.
Allow the first sealer coat to dry fully before applying the second. Lightly sand between coats with 400-grit wet/dry sandpaper for a smoother finish. Once sealed, your barn quilt is ready to hang.
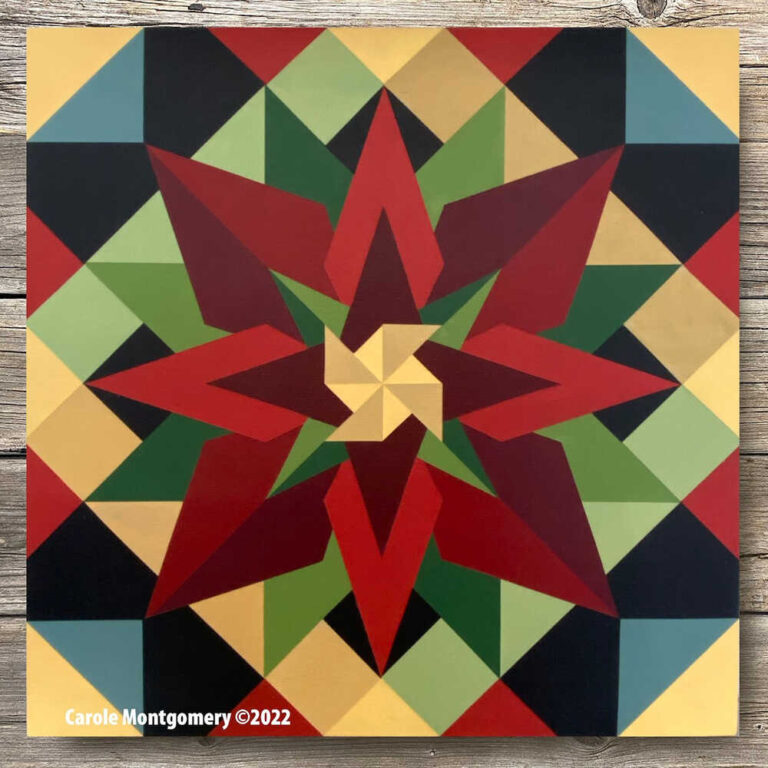
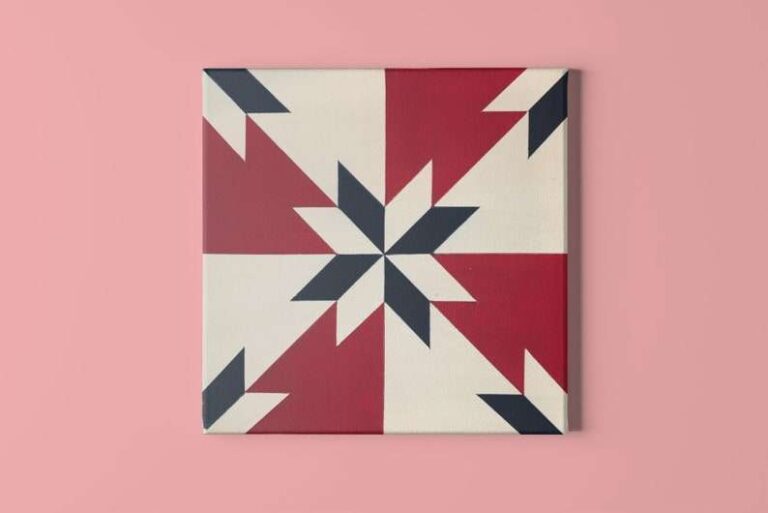
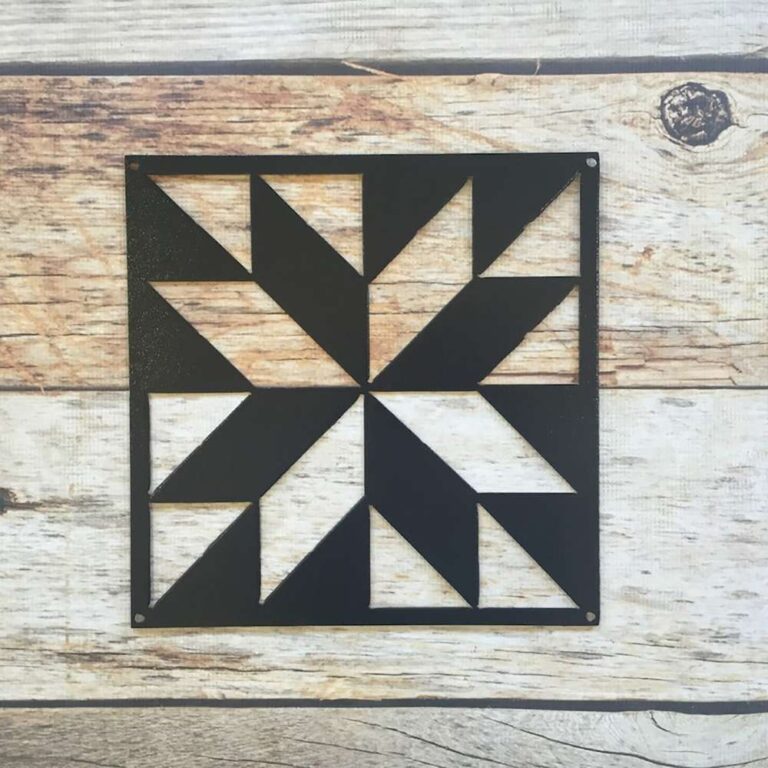
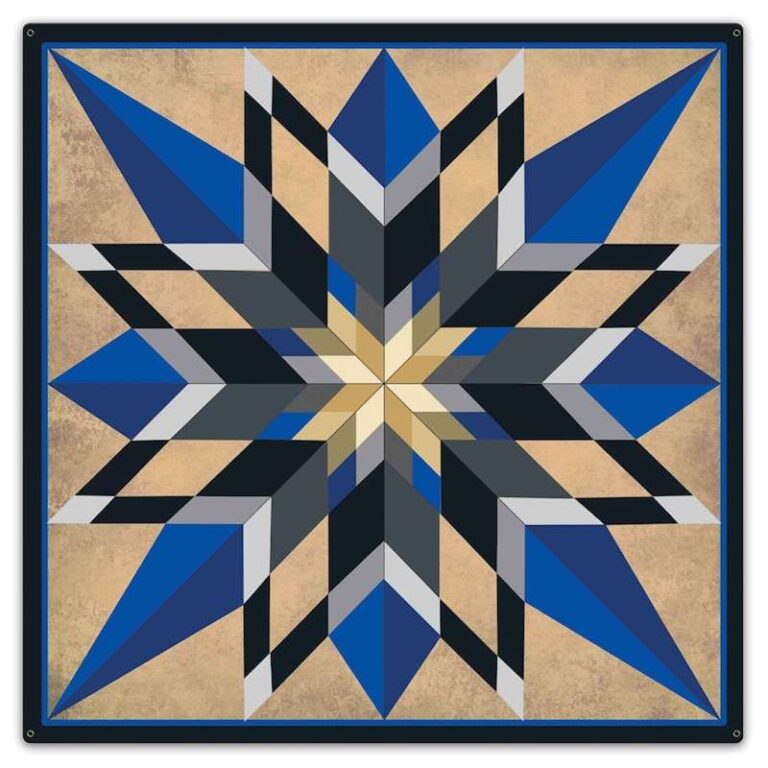
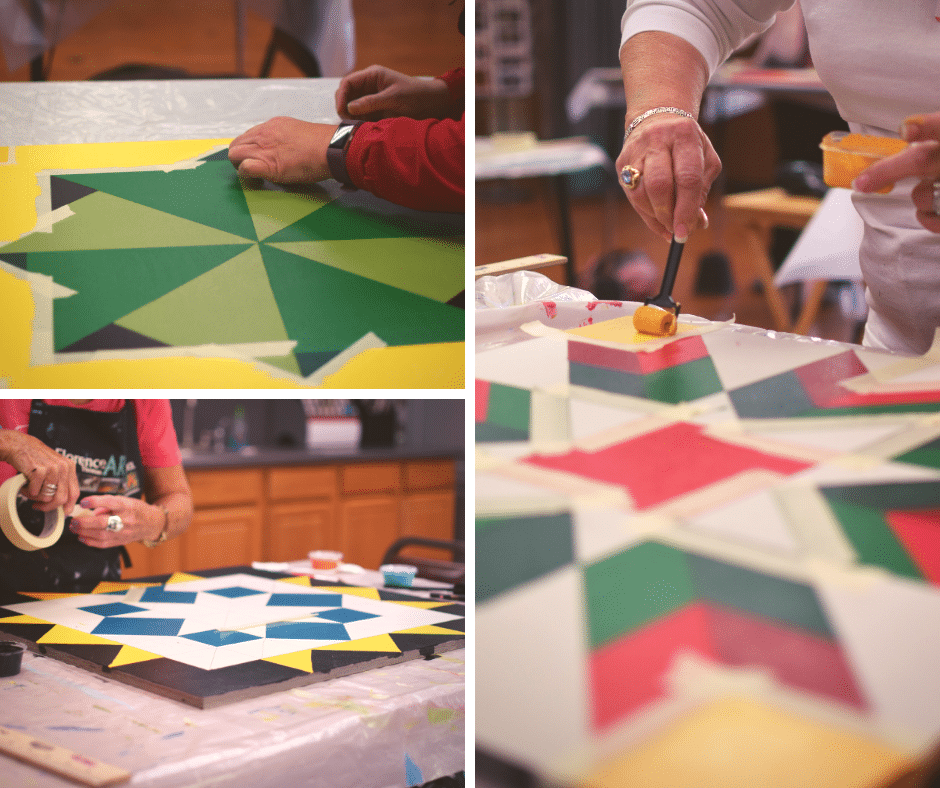
What a Finished Barn Quilt Looks Like
Once the sealer is dry and the hardware is mounted, the result is a piece of folk art that can last decades outdoors. Here are some examples of finished barn quilts from professional makers:
How to Hang Your Barn Quilt Block
Use stainless steel or galvanized hardware to avoid rust stains on your finished piece. Keyhole brackets mounted to the back of the board are the cleanest option — they allow the quilt to hang flush against the wall with no visible hardware from the front. Space the brackets 12 to 18 inches from each corner for boards up to 4×4 ft; larger boards may need a third center bracket.
Leave a small gap between the back of the board and the wall surface. This allows air circulation that prevents moisture buildup, which is the primary cause of paint failure on outdoor wood pieces. One-quarter to one-half inch of clearance is sufficient.
Common Mistakes and How to Avoid Them
- Skipping the second primer coat — one coat often leaves wood grain visible, which shows through all subsequent paint layers.
- Taping over wet paint — always let paint dry 24 hours before applying tape over it. Partial drying is not enough; the tape will pull the paint.
- Using interior paint — interior latex looks identical to exterior on the shelf but lacks the UV inhibitors and flexibility needed to survive temperature swings. Always use paint specifically labeled for exterior use.
- Thin wood choice — half-inch plywood warps, especially in humid climates. Use three-quarter inch or thicker for any board larger than 2×2 ft.
- Skipping the sealer — exterior paint alone is not sufficient for long-term UV protection. The sealer is what locks color in. Reapply every two to three years.
- Rushing the grid transfer — a grid that is one inch off-center creates a visible asymmetry in the finished design. Measure twice.
Frequently Asked Questions
How long does it take to paint a barn quilt block?
Expect a total project time of three to five days for a 4×4 ft barn quilt, accounting for drying time between coats. Active work time is typically four to six hours across those days. A smaller 2×2 ft block can be completed in two days with the same process.
What kind of paint is best for barn quilts?
Exterior latex paint in flat or satin finish is the standard choice. Latex dries faster than oil-based paint, cleans up with water, and remains flexible through temperature changes. Avoid high-gloss finishes — they highlight brush marks and roller texture that flat and satin hide.
Can I paint a barn quilt on canvas instead of wood?
Yes, though canvas barn quilts are intended for indoor display only. For outdoor use, wood is the correct substrate. Canvas stretches and sags in moisture and UV exposure, causing the paint to crack along the weave.
How do I choose my first barn quilt pattern?
Start with a design that uses straight lines and no more than three colors. The Ohio Star, Log Cabin, and Nine Patch are all excellent choices for first-timers. Designs with curved lines (like the Double Wedding Ring) require considerably more taping skill. See our full guide on how to choose a barn quilt pattern for a complete breakdown by skill level.
What size should my barn quilt be?
The most common sizes are 2×2 ft for small decorative pieces, 2×4 ft for fence or porch placement, and 4×4 ft for barn walls. Larger sizes (6×6 ft and up) exist but require structural support behind the board to prevent warping. For detailed guidance, see our guide on how big a barn quilt should be.
Once your barn quilt block is painted, sealed, and hung, you have created something that may well outlast the building it hangs on. Barn quilts installed in the 1990s with proper materials are still displaying their original colors today. Take your time with each step and you will end up with a piece of folk art worth keeping for generations.